 We literally went chalkboard CRAZY!
 We took inexpensive serving platters/trays from the Dollar Tree and painted 3 coats of chalkboard paint on them. Some people added a fun ribbon to the back for hanging, others left them as they were with plans to display on an easel. It is such a fun take on chalkboards!
Hang these stylish chalk boards amidst framed photos for a super cool wall arrangement. Place them on an easel on the kitchen counter and write your menu, grocery list, encouraging words, or a special message for a dinner party you might be hosting.
Do you see the round blue chalkboard hanging in the picture? That is actually a charger that you would place your dinner plate on to make your table setting a bit fancier. When painted with chalkboard paint, you could actually write a name or message on it and then place a clear plate on top!
We also used inexpensive frames from the Dollar Tree (we love this place!) and painted the frame with acrylic paint and their color of choice. This took about 2-3 coats as well, depending on the look you are going for.
Next, we painted a sheet of card stock with chalkboard paint. Once that was dry, we cut the card stock down to the size of the 8x10 frame, took the glass out, inserted the card stock, then placed the piece of glass behind for a good hard writing surface. Put the back on your frame and you now have yourself one cute framed chalkboard!
You can use these frames in the same way as the trays or you could add a photo (like shown above), leaving room to write something too.

Daspri and I did go a little chalkboard crazy before the class! We wanted to make several things so that we could show everyone the endless options with chalkboard paint.....especially since we were teaching everyone how to make their own chalkboard paint!
WHAT?!
Yeah, that's right, you missed out! Ha!
Okay, okay, I'll tell you how to make your own too.
Keep reading!
You can also use your painted card stock to make party banners, that you can reuse!
Cut them and make cute label cards for your food and drink for your next event.
And add a piece to a homemade greeting card too!
Make some cute wine glass tags/markers! Way cute!
 Let's see how the class went!
Here is our paint station for mixing the chalkboard paint.
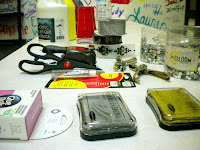
And of course, the rest of our goodies!
See those stamp pads-they ROCK!
This is one of my favorite craft supplies. I use them a lot, but for this class, I used them to give our trays and frames a bit of a distressed look.
Because the trays and frames had a bit of detailing around the borders, you simply run the stamp pad over the detailing and only your raised, detailed border will pick up the ink!
Lovely Hannah, from Branch Out, is painting a fun swirl design for one of the ladies. Love it!
Here is Daspri showing some of the ladies how to recycle the little tags on your new clothing. Rather than throwing them away, paint them with chalkboard paint and you have an easy and fun gift tag!
Are you ready to make some paint?
It is so crazy easy that it will blow your mind and you may never purchase the tiny, expensive can at the store, ever again!
Here is what you need:
-1 Tablespoon of White Dry Non-Sanded Grout
(It MUST be NON-SANDED)
-1/2 cup of Acrylic paint- color of your choice
That's it! Seriously!
Okay, here is what you do:
-Make sure you are in a well ventilated area when using the grout. It is a very fine powder and you do NOT want to inhale it.
-You will take your grout and your paint and mix them together. We used plastic cups or containers with lids. Mix very well.
Your paint will still be a bit gritty but that is okay because as soon as you start painting, the grit will brush out.
Now, VERY IMPORTANT, you must let your coats of paint dry COMPLETELY before adding another coat. Otherwise, you will simply be moving your paint around (not actually coating it again) and this will result in clumps.
You want to do about 3 coats. Don't worry, the paint actually dries pretty quickly, IF you let each coat dry before doing another.
Once your coats are done, you will want to let your piece dry completely for about 48 hours before writing on it.
Then, you will need to prep your service, which is really just a fancy way of saying this: rub the side of your chalk all over your chalkboard surface, then wipe off and you are ready to write!
We found that once you are done with your paint, if you cover it, then it will actually keep for a bit. So far, it has been a week for ours and it is still usable. You will just need to give it a good stir.
Now, you're ready to make everything a chalkboard!
Seriously.....GO!
-Jenny
Inspiration links:
-Chalkboard Paint


Jenny that looks soooooo fun! Wish I could have been there! ;) Thanks for some more cute and inexpensive ideas to do with chalkboards!
ReplyDelete